
You know that moment when you tidy the whole living room, fluff the pillows, light a candle, and somehow the fireplace still looks… a little sad? Maybe it’s the orangey brick. Maybe it’s the skinny builder-grade mantel. Or maybe the whole thing just feels stuck in 2008 while the rest of your space is begging for a softer, warmer, more pulled-together look. The good news is you do not need a full renovation or a giant budget to fix it. Truly. Some of the best fireplace makeovers I’ve seen started with paint, peel-and-stick tile, a few pieces of trim, and one really good Saturday playlist. And when the fireplace changes, the whole room shifts with it. It feels more finished. More intentional. More like you. In this post, I’m sharing 16 DIY fireplace makeover ideas that can completely change the feel of your living room for under $500, without turning your house into a dusty construction zone for three weeks. Here’s what actually works.
Paint the Brick a Soft Warm White
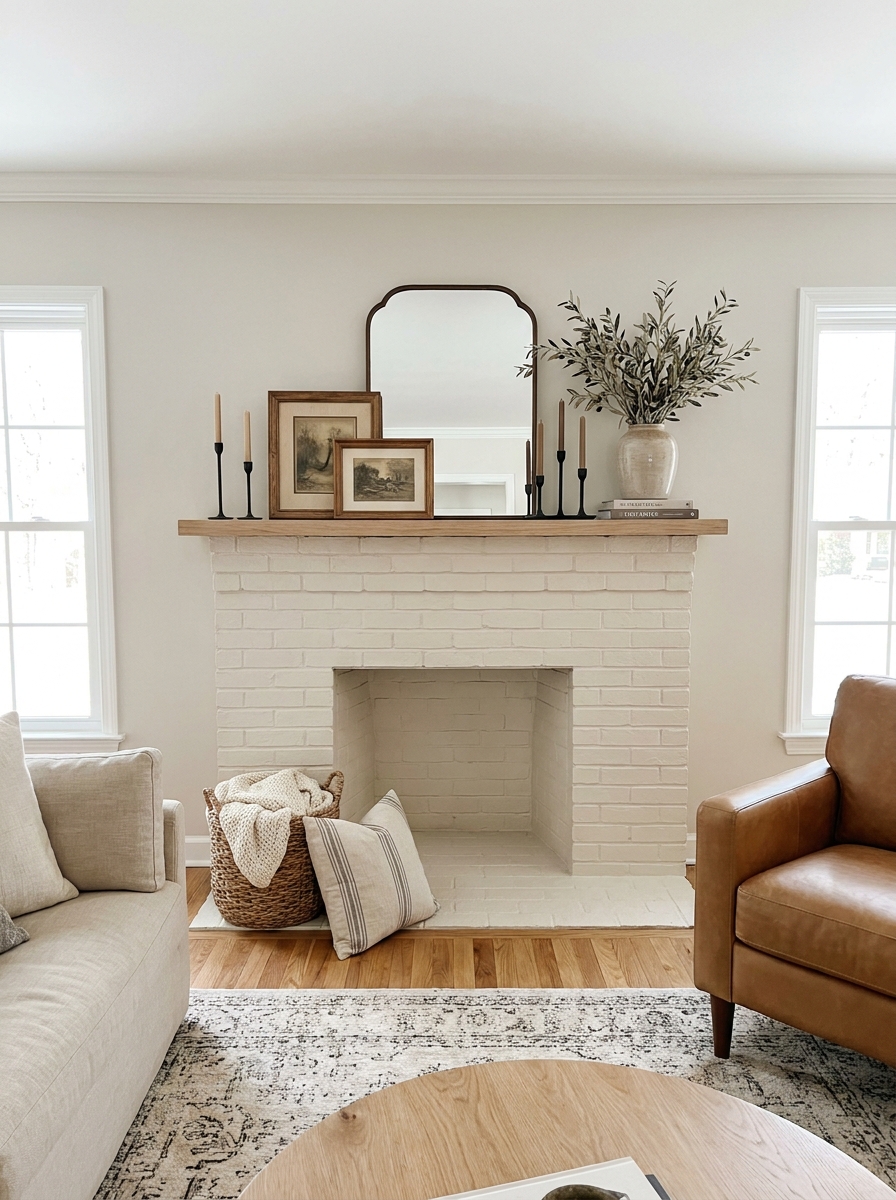
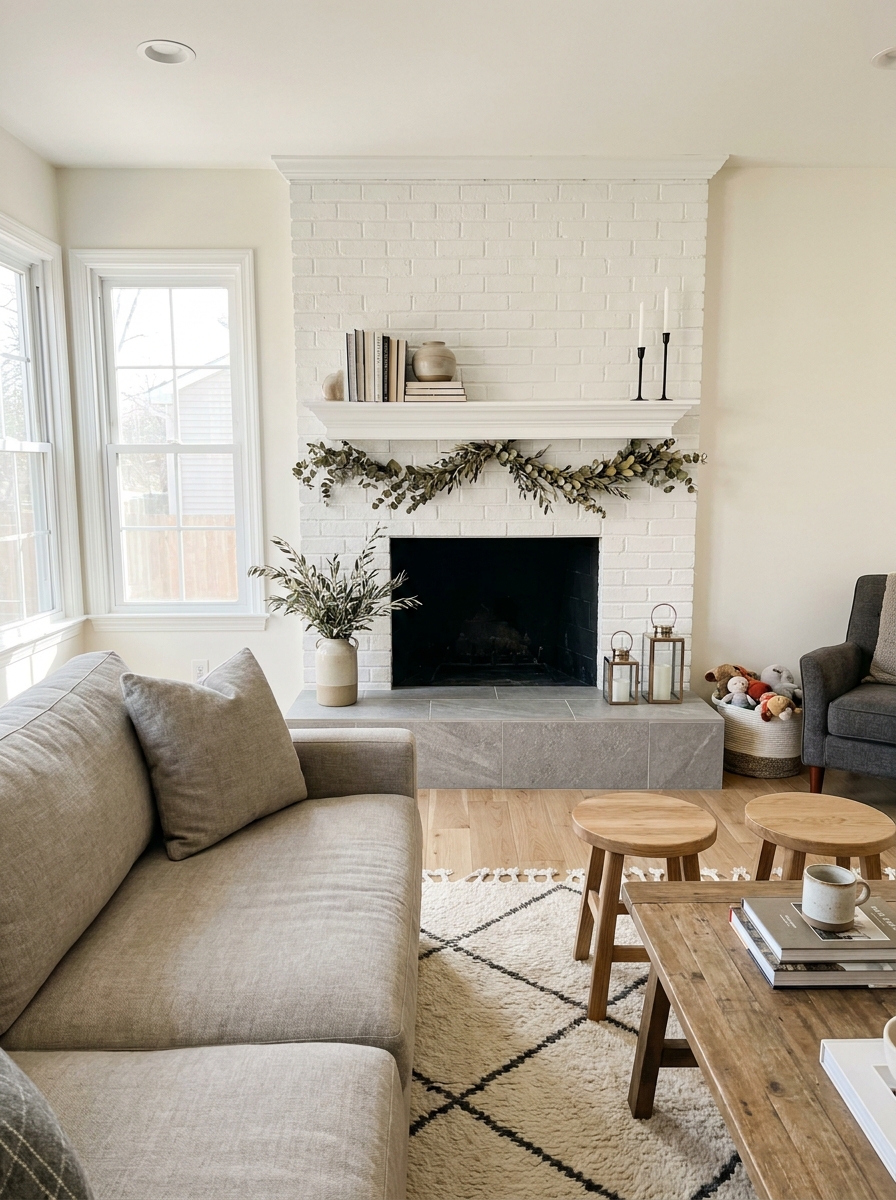
If your brick fireplace is pulling the whole room into a dark, dated place, paint can be the fastest fix. And honestly, it still amazes me how much a soft warm white changes everything. The heavy red or orange tones disappear, the mantel stands out, and suddenly your seating area feels brighter and calmer without needing all new furniture. It is one of those updates that looks expensive even when it absolutely is not. Go for a warm white instead of a stark one. Bright icy white can make brick feel flat and chalky, especially in family rooms with beige sofas, oak floors, or warm wood accents. A creamy white keeps some softness and works beautifully with black fireplace tools, thrifted frames, and a simple vase of olive branches. Prep matters here, though. Scrub the brick well, use the right primer, and be patient with the grooves. And if you are nervous about losing texture, don’t be. Painted brick still has all that lovely depth. It just feels cleaner, lighter, and more current. For many homes, this one project alone makes the living room feel like it finally caught up with the rest of your style.
Pro Tip: Test your white paint on both the brick face and the mortar lines first, then check it morning and evening before committing.
Give a Skinny Builder Mantel a Chunky Wood Upgrade
A thin builder mantel can make even a decent fireplace look a little flimsy. You know the type. It is there, technically, but it has no presence. Swapping it for a chunky wood mantel changes the proportions in the best way. The fireplace starts to feel grounded, like it belongs in the room instead of just being attached to the wall. You do not need reclaimed barn wood shipped from some mysterious mountain town, either. A stained pine board, a hollow box beam build, or even a good faux wood mantel can get you there for way less. The trick is scale. Go a little thicker than feels safe. That’s usually the sweet spot. A richer wood tone also adds warmth if your room leans neutral, and it looks especially pretty against painted brick, tile, or a simple drywall surround. This is also one of those projects that gives you decorating payoff right away. Candlesticks look better. Frames look better. Even your random little vase from Target suddenly looks like styling. And because the mantel becomes a stronger focal point, the whole room feels more balanced without you having to redo everything else around it.
Pro Tip: Before buying wood, tape the mantel’s proposed height and depth on the wall so you can see if the scale feels right from across the room.
Frame the Fireplace With Simple DIY Trim
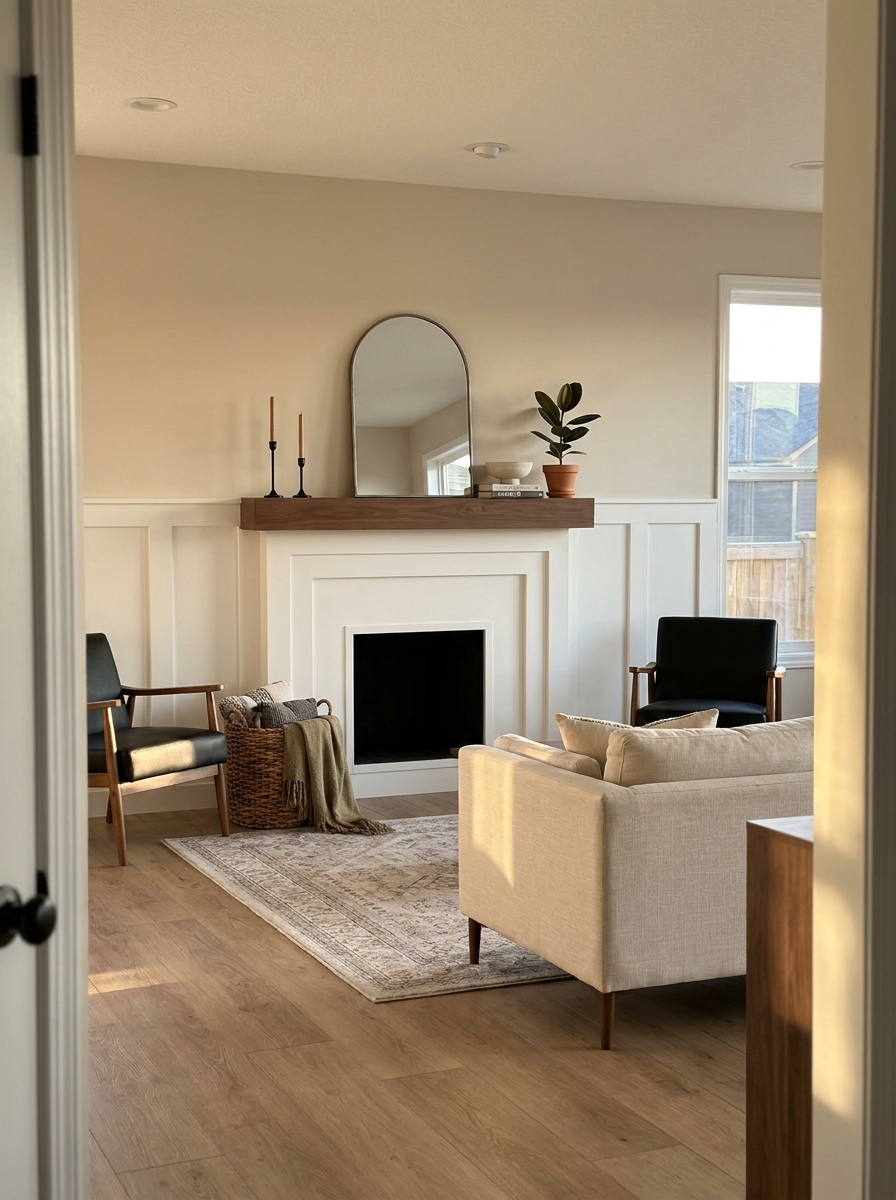
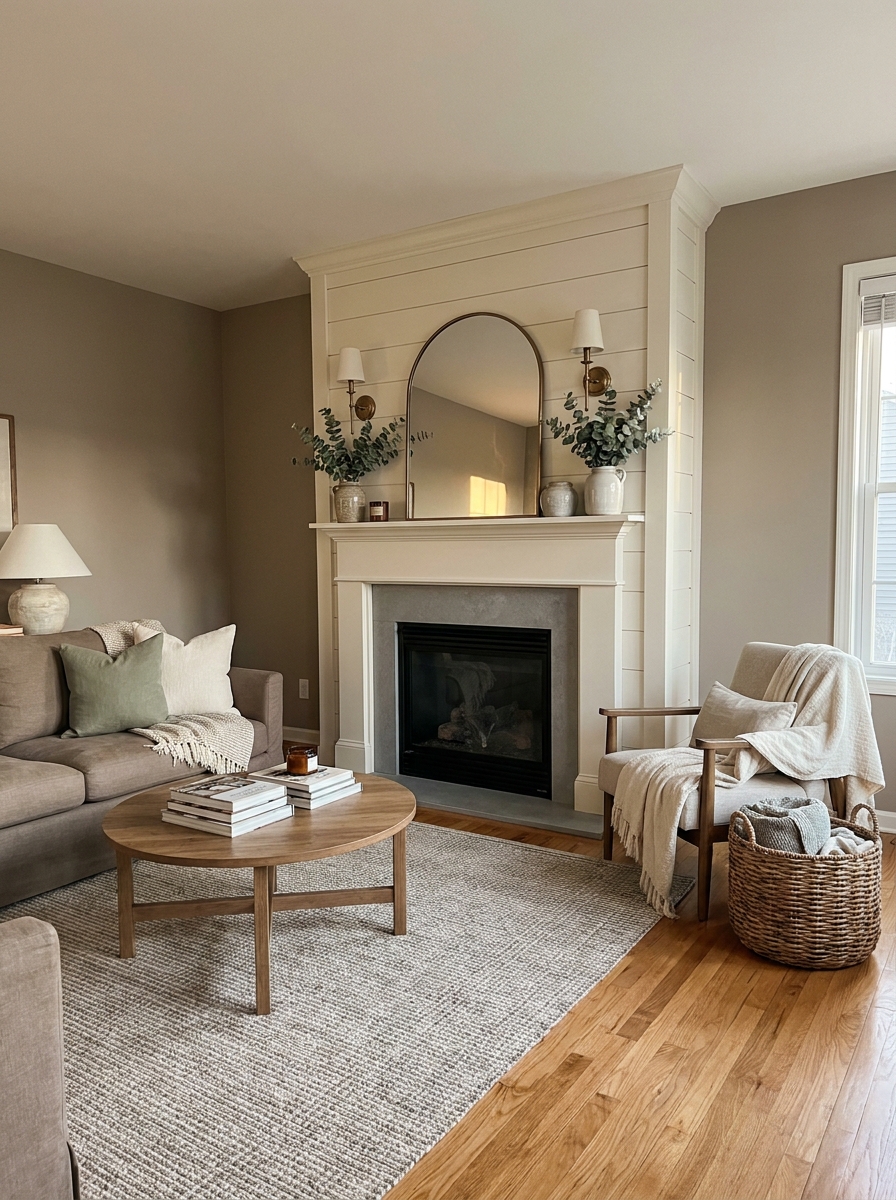
Sometimes the fireplace itself is not terrible. It just looks unfinished. That is where trim comes in. A few pieces of inexpensive molding can make a plain fireplace surround feel custom, polished, and way more intentional. It is such a smart trick for builder-grade fireplaces that have zero detail and kind of disappear into the wall. You can create a clean rectangular frame, add subtle panel molding on both sides, or build out a classic farmhouse-style surround with flat stock and caulk. None of it has to be complicated. Once it is painted all one color, the result feels crisp and architectural, like the room suddenly got better bones overnight. I love this move when the fireplace wall feels blank or awkwardly wide because trim helps define the focal point without adding clutter. And here’s the part people forget. Trim changes the feel of the whole living room because it gives your eye something to land on. The sofa looks more anchored. The mantel decor feels more elevated. Even a budget mirror above the fireplace starts reading as intentional design. For a project made from wood strips, a nail gun, and patience, the payoff is wildly satisfying.
Pro Tip: Use painter’s tape to mock up your trim design first so you can adjust spacing before cutting a single board.
Cover Dated Tile With Peel-and-Stick Stone Look Panels

Old fireplace tile can be such a mood killer. Especially when it is shiny beige, peachy tan, or covered in a tiny busy pattern that screams early-2000s builder special. If ripping it out sounds messy and expensive, peel-and-stick stone look panels are a really solid middle ground. They give you that fresh, updated surround without the demolition drama. The key is choosing a finish that looks quiet and believable. Think soft limestone, slate-inspired gray, or a matte stacked-stone effect instead of anything too glossy or fake. Once installed, the fireplace feels more substantial and current, and the room gets that little hit of texture every cozy living room needs. Pair it with simple decor and let the surround do the talking. This works especially well if your mantel is staying simple or your furniture is pretty neutral. The new tile look gives the fireplace enough personality that the space does not need much else. Add a mirror, a couple of lanterns, maybe a vase with eucalyptus, and you are done. It is one of those under-$500 projects that makes guests assume you hired someone, which is honestly always a nice little bonus.
Pro Tip: Order one sample panel first and tape it to the surround so you can check the color against your wall paint and flooring.
Create a Faux Limewash Finish for Soft Movement
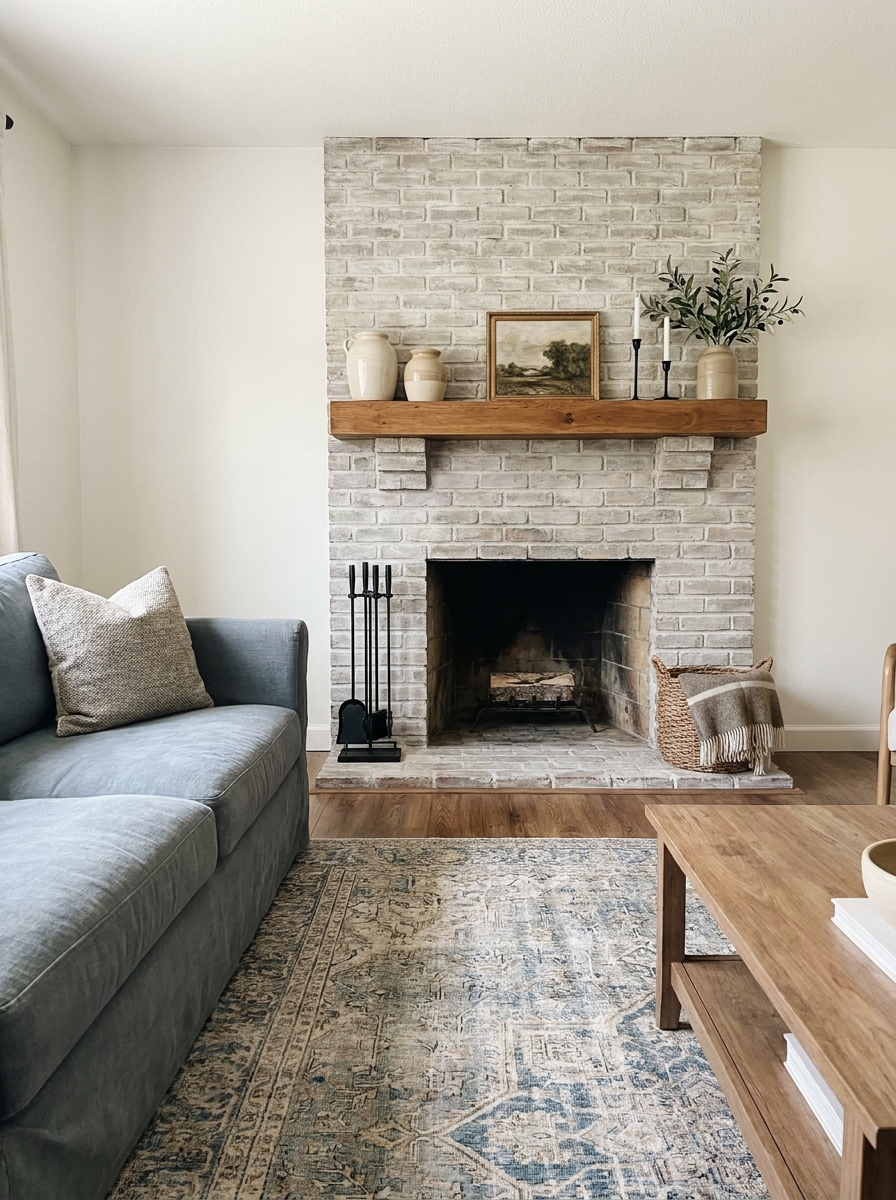
If solid paint feels a little too flat for your taste, a faux limewash finish can be such a pretty answer. It gives brick or surround tile that cloudy, softly layered look that feels old-world in the nicest way. Not fussy. Not formal. Just relaxed and full of depth. And yes, you can absolutely fake the look with watered-down paint and a good brush technique. This finish works beautifully in homes that lean warm, neutral, and a little collected. It is especially lovely if you like pottery, old wood, woven textures, and that slightly rustic Pinterest look that feels cozy without trying too hard. The variation in tone keeps the fireplace from looking stark, and it plays really nicely with sunlight through windows because the finish shifts all day long. I also love that it is forgiving. A perfect factory finish would actually ruin the charm here. You want some movement. Some softness. A bit of irregularity. That’s the whole point. Once you add a wood mantel, a soft rug, and a couple of imperfect thrifted pieces, the fireplace starts feeling like it has history, even if your house is only twelve years old and came with very questionable beige tile.
Pro Tip: Work in small sections and dab with a damp rag as you go so the finish stays soft instead of streaky.
Tile Just the Hearth for a High-Impact Mini Makeover
You do not always need to redo the whole fireplace to make a big difference. Sometimes the hearth alone is the visual problem. Maybe it is chipped. Maybe it is builder-basic. Maybe it is just weirdly pink. Retiling only the hearth is one of my favorite budget moves because it gives you a strong before-and-after moment without dragging the project out for days. A simple brick-pattern tile, a matte porcelain in a stone tone, or even a classic checker look can instantly sharpen the whole fireplace area. It grounds the space and makes the fireplace feel more finished from the bottom up. And because the hearth sits low, you can play with a little texture or pattern there without overwhelming the room. It’s a small zone, but it works hard. This is especially good in family rooms where the mantel and surround are already decent. Refresh the hearth, style it with lanterns or a basket, and suddenly everything around it looks better too. Funny how that happens. The room feels cleaner. More deliberate. More designed. For a project that often lands well under budget, the visual payoff is really hard to beat.
Pro Tip: Choose grout one shade darker than your tile if you want the hearth to stay looking fresh with less visible dust and ash.
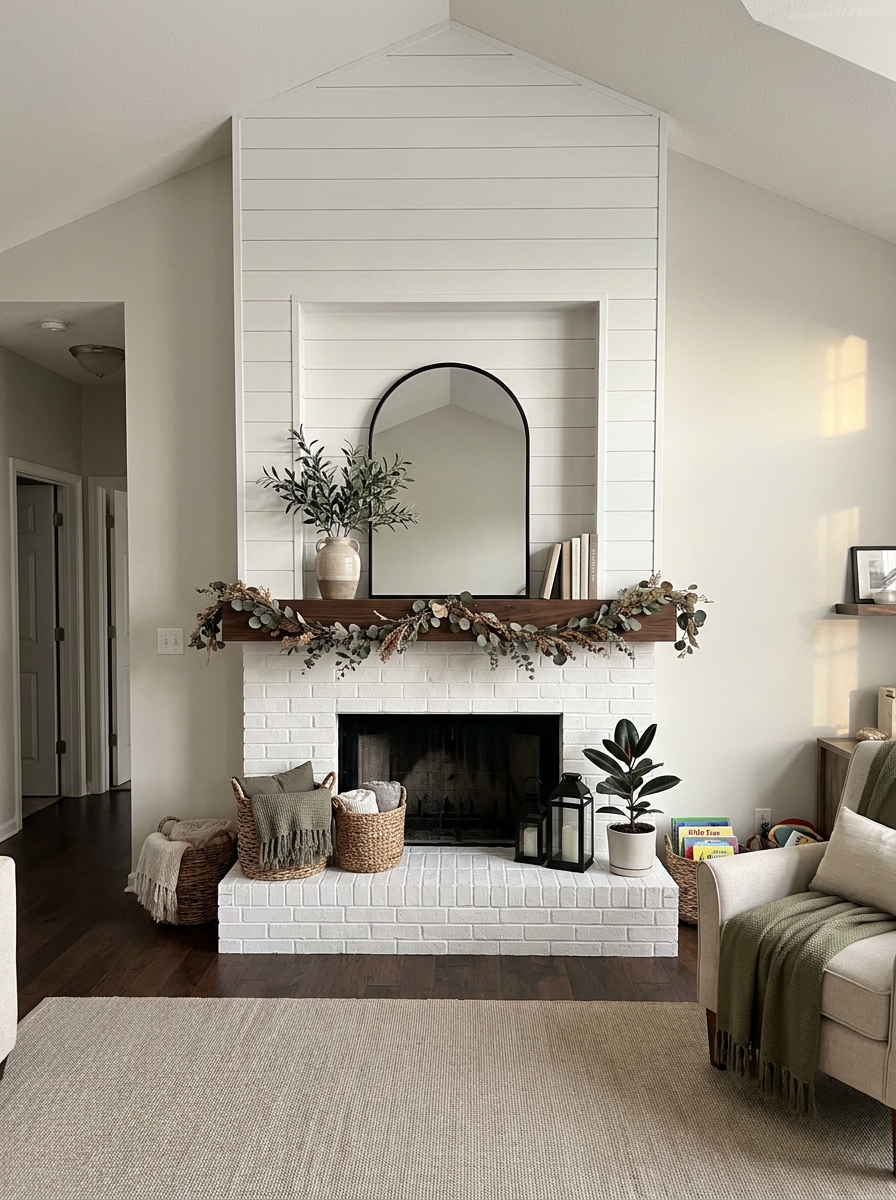
Add a Shiplap Fireplace Bump-Out on a Budget
A plain drywall fireplace can feel a little forgettable, especially in a bigger room where the wall needs more presence. A simple shiplap bump-out changes that fast. It adds shape, subtle texture, and that cozy focal-point feeling without asking you to gut anything. And no, it does not have to read super farmhouse if that is not your thing. Painted in the right color, it can feel clean, transitional, and really current. You can create the look with MDF strips, plywood, or pre-primed boards, depending on your budget and tools. Extend the surround slightly, wrap it in vertical or horizontal planks, then top it off with a mantel that has a little heft. Suddenly the fireplace wall feels custom. Like it was always supposed to be the star of the room instead of the television trying to do all the heavy lifting. This is one of my favorite options for newer homes because it adds character where there wasn’t much before. It also photographs beautifully, which matters if you are the type who rearranges throw pillows and then immediately takes a picture. No judgment. I absolutely get it. The finished look feels layered, homey, and far more expensive than the supply list suggests.
Pro Tip: Use a level on every third board during installation because walls are sneaky and one crooked line can throw off the whole look.
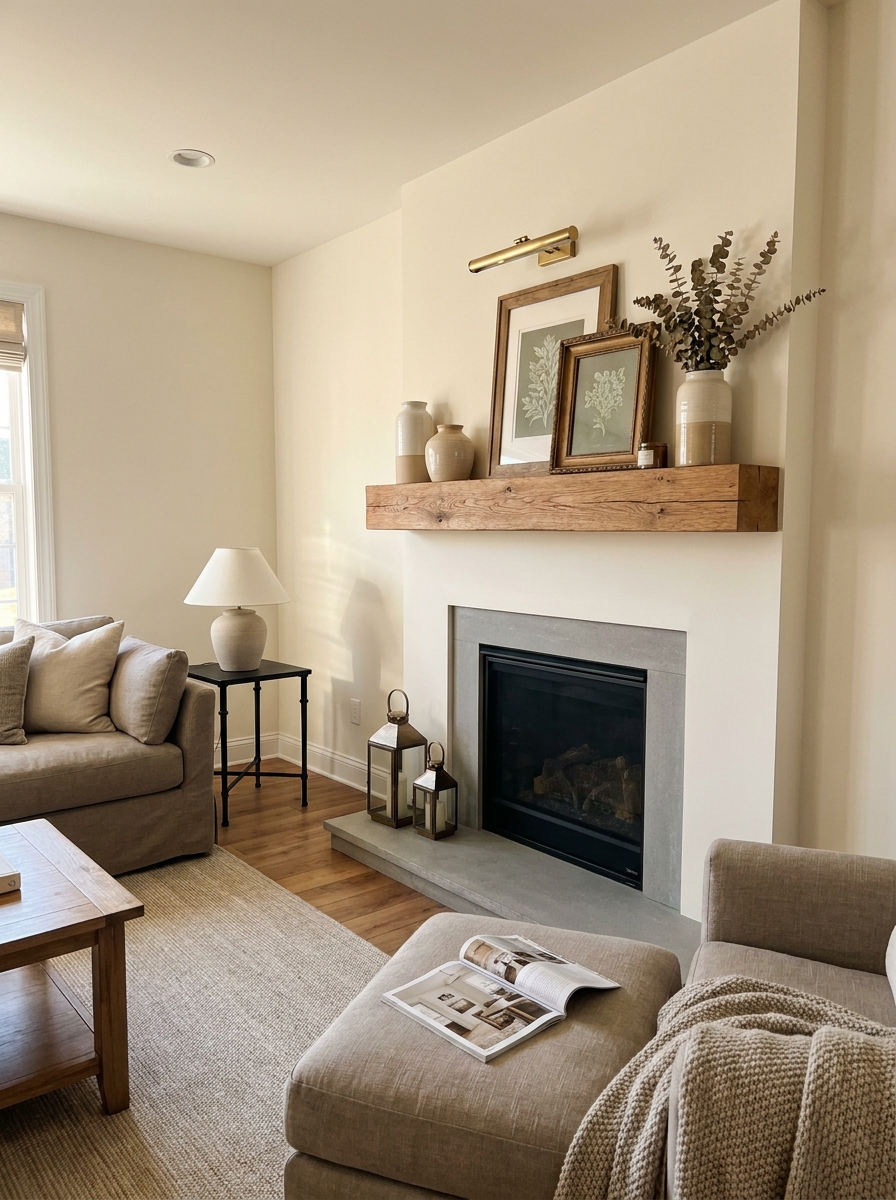
Swap a Busy Mantel Shelf for a Clean Modern Beam
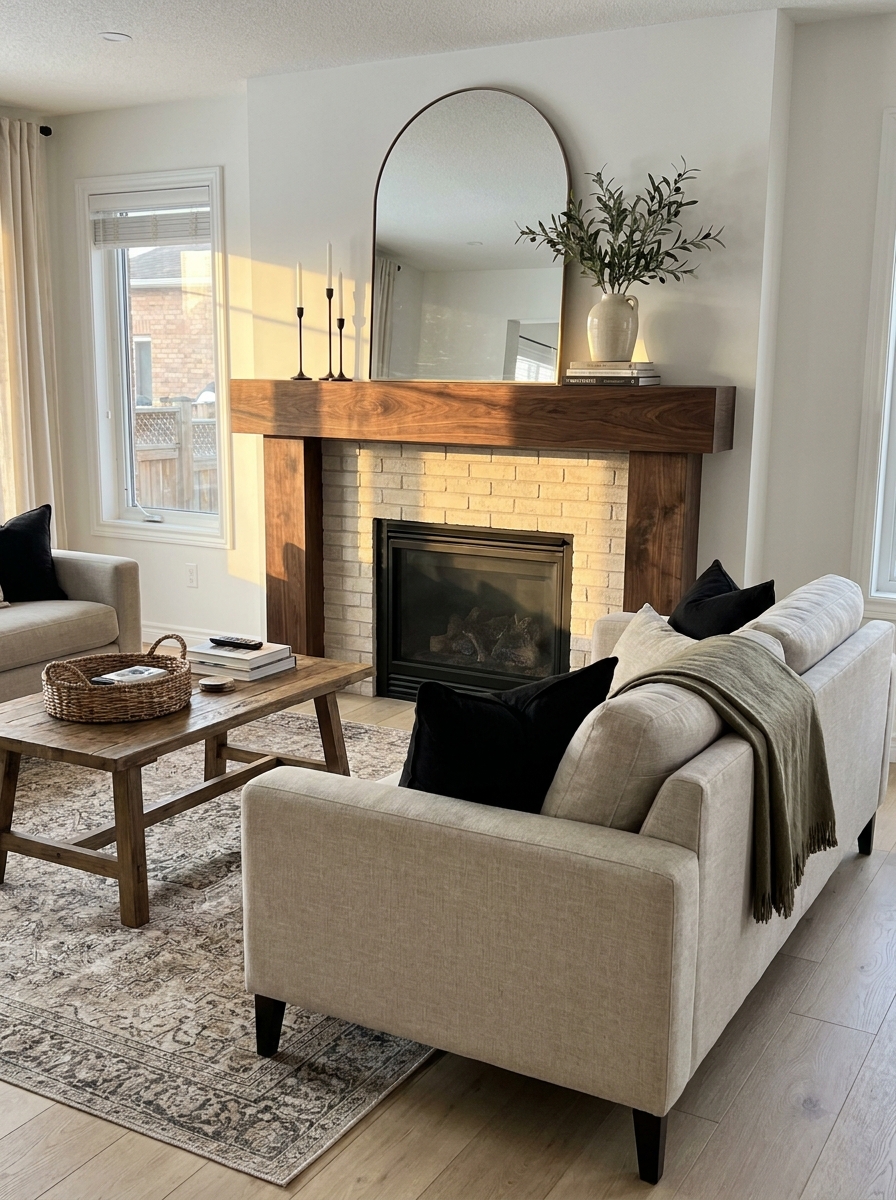
Some mantels are just doing too much. Curves, scrolls, weird little ledges, glossy stain from another era. If your fireplace feels fussy, replacing that shelf with a clean modern beam can calm the whole room down in one move. It is such a good reset. The fireplace looks simpler, stronger, and more in step with the way so many of us actually decorate now. A beam mantel works especially well if you love a mix of modern farmhouse and transitional style. It gives you contrast without clutter. And because the lines are cleaner, whatever you put on top feels more intentional. A big mirror, a few candlesticks, one vase with branches. Done. You are not fighting the mantel anymore. This update is also surprisingly budget-friendly if you build a hollow beam yourself or use stained common boards. Keep the finish matte and the shape streamlined. That’s where the magic is. Once it is up, the fireplace starts to feel edited in the best sense of the word. Less visual noise. More breathing room. Sometimes a makeover is not about adding more at all. It is about removing what was making the room feel busy in the first place.
Pro Tip: Choose a matte or satin topcoat instead of gloss so your beam mantel looks custom and not overly orange or shiny.
Use Matte Black Paint for a Moody Firebox Refresh
If the inside of your fireplace is faded, rusty, or coated in that dusty gray-black that somehow always looks dirty, matte black paint is a tiny update with big impact. It sharpens the firebox opening and gives the whole fireplace more contrast, even if you do nothing else. And when the firebox looks crisp, the mantel styling around it suddenly pops. This is one of those little details that makes a makeover feel finished. Especially in neutral rooms. The black opening grounds all the softer colors around it and gives your eye a clean focal point. It also works beautifully with brass, wood, white paint, stone-look tile, and even old brick. Basically, it plays well with everything. I love this project because it is fast, affordable, and weirdly satisfying. It is also great if you are easing into a fireplace makeover and want a low-risk first step. You can paint the firebox, add a couple of lanterns, maybe style the mantel a bit better, and already the space feels more intentional. Sometimes that little momentum is exactly what gets the bigger makeover moving. We all need an easy win once in a while.
Pro Tip: Make sure you’re using heat-safe paint designed for fireboxes or high-heat surfaces, not standard wall paint.
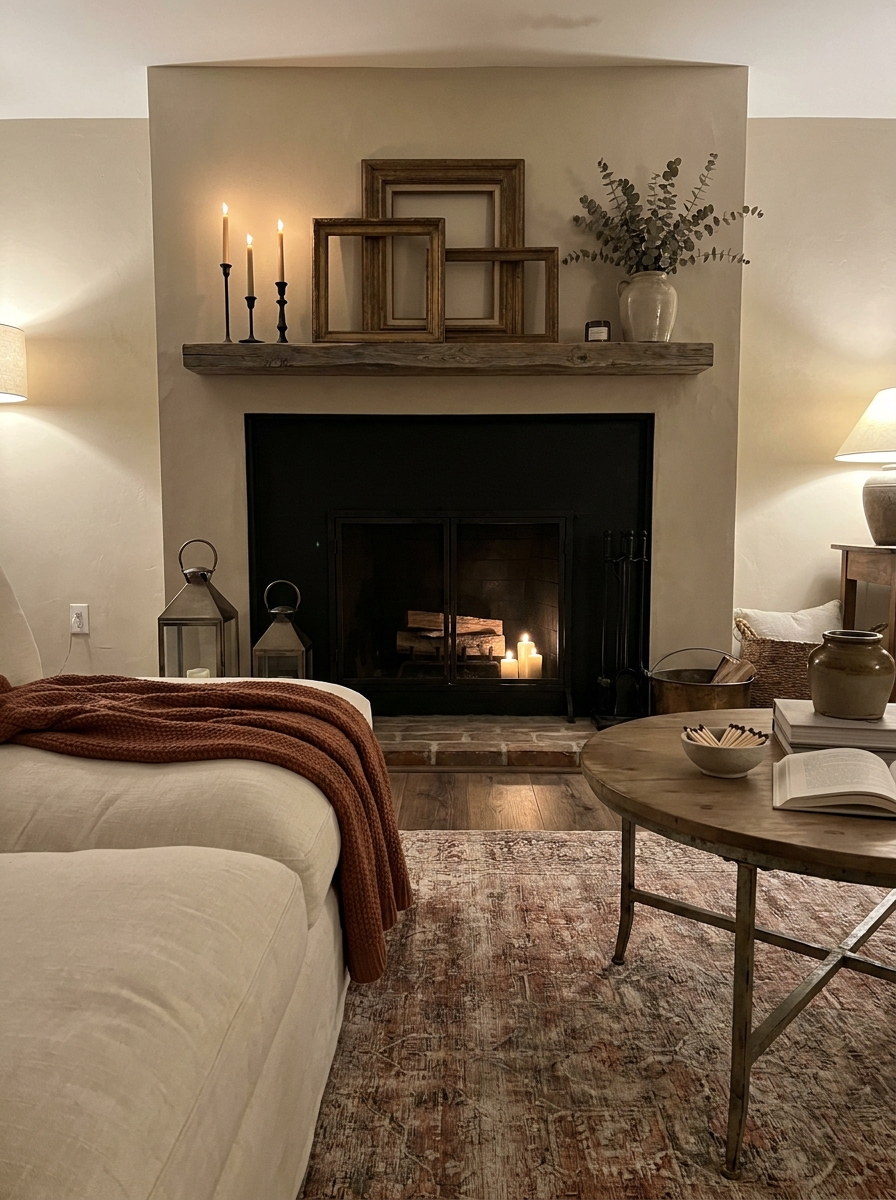
Style the Mantel With Thrifted Frames and One Big Mirror
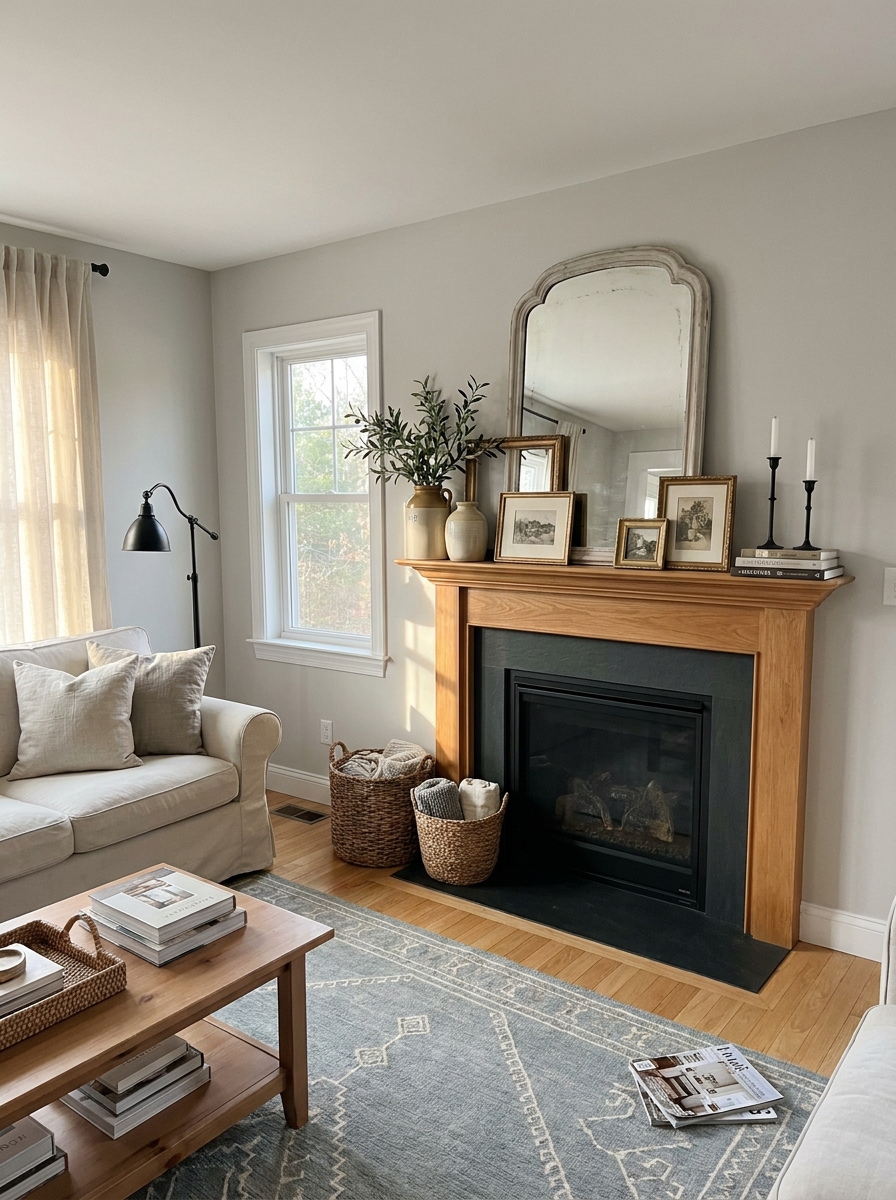
Sometimes the fireplace itself is fine. It is the styling that is making it feel flat. If your mantel has a random mix of tiny decor pieces that never quite look right, simplify it. One big mirror paired with a few thrifted frames can completely change the vibe. It feels layered, relaxed, and collected instead of cluttered. The mirror gives you height and reflection, which helps the whole room feel brighter and more open. Then the frames add personality without costing much at all. I love mixing wood, black, and brass finishes as long as the art inside stays soft and simple. Old sketches, printable landscapes, even empty vintage frames can work if the shapes are good. Lean them instead of hanging everything perfectly. That little bit of looseness is what makes it charming. And please leave some breathing room. Not every inch of the mantel needs a thing on it. A vase with branches, maybe candles, maybe a small stack of books. That’s enough. The goal is a mantel that supports the fireplace, not one that looks like it is trying to win a decorating contest. The room will feel calmer instantly, and honestly, calmer usually looks more expensive.
Pro Tip: Use the largest mirror you can comfortably fit above the mantel, then layer smaller frames in front so the arrangement feels full but not crowded.
Wrap the Surround in Fluted Wood for Instant Custom Texture
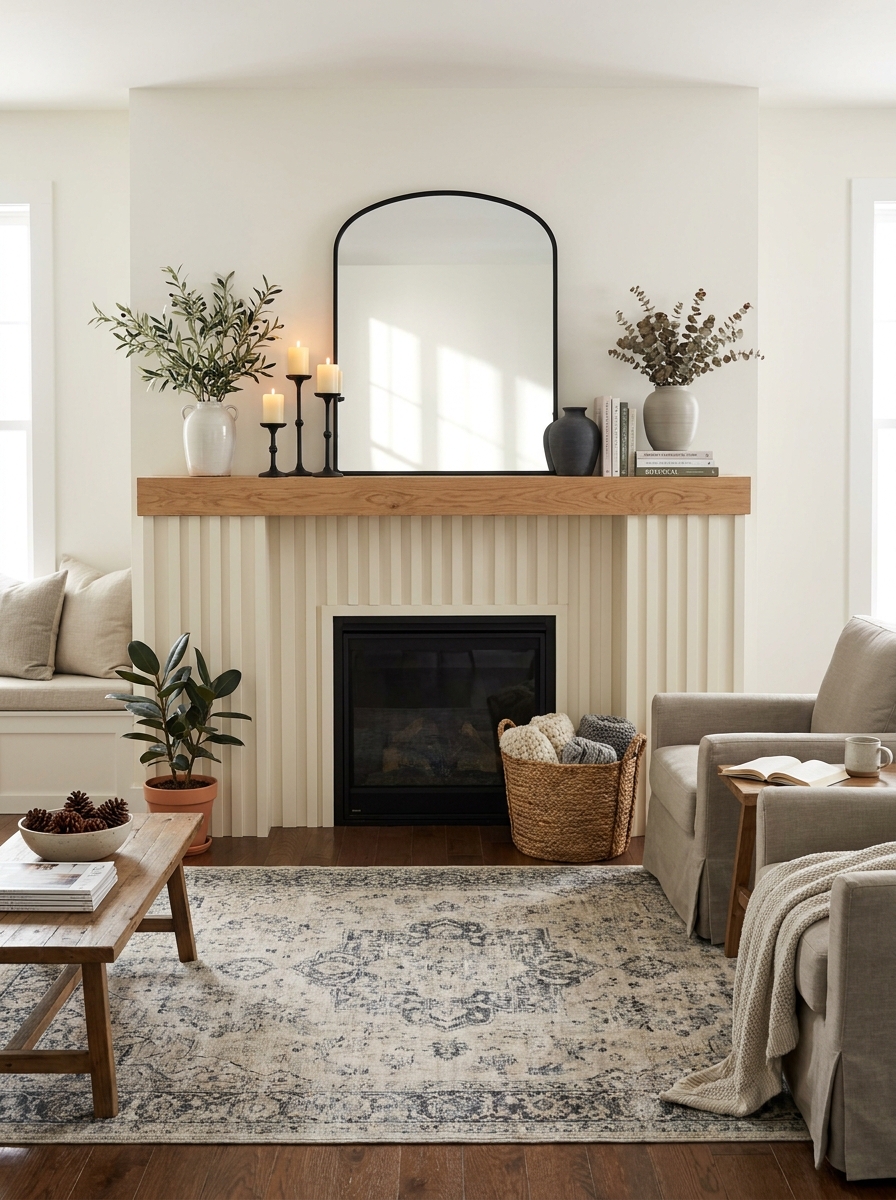
If your fireplace feels flat and a little forgettable, fluted wood is such a fun fix. It adds that custom built-in look without needing a full renovation. You can use half-round dowels, flexible fluted panels, or even thin trim pieces attached in rows. Suddenly the whole surround has movement, shadow, and that pretty designer texture people always stop and stare at. It feels warm and tailored at the same time. What I love most is how it changes the room even before you style a single thing. In daylight, the grooves catch soft shadows and make the fireplace feel taller. At night, lamp light makes the texture glow in the prettiest way. Painted in a creamy neutral, it leans soft and classic. Stained in a mid-tone wood, it feels richer and more modern. Either way, it turns a basic fireplace wall into something that feels intentional. This one is especially good if your living room needs character but you are trying to stay under budget. A little wood trim, adhesive, filler, and paint can go a long way. It looks expensive. It really is not. And that is my favorite kind of makeover.
Pro Tip: Before attaching any fluted pieces, mark a center line on the surround and work outward so the spacing stays even and the fireplace looks balanced from every angle.
Install an Electric Insert for a Cozy Glow Without Major Construction
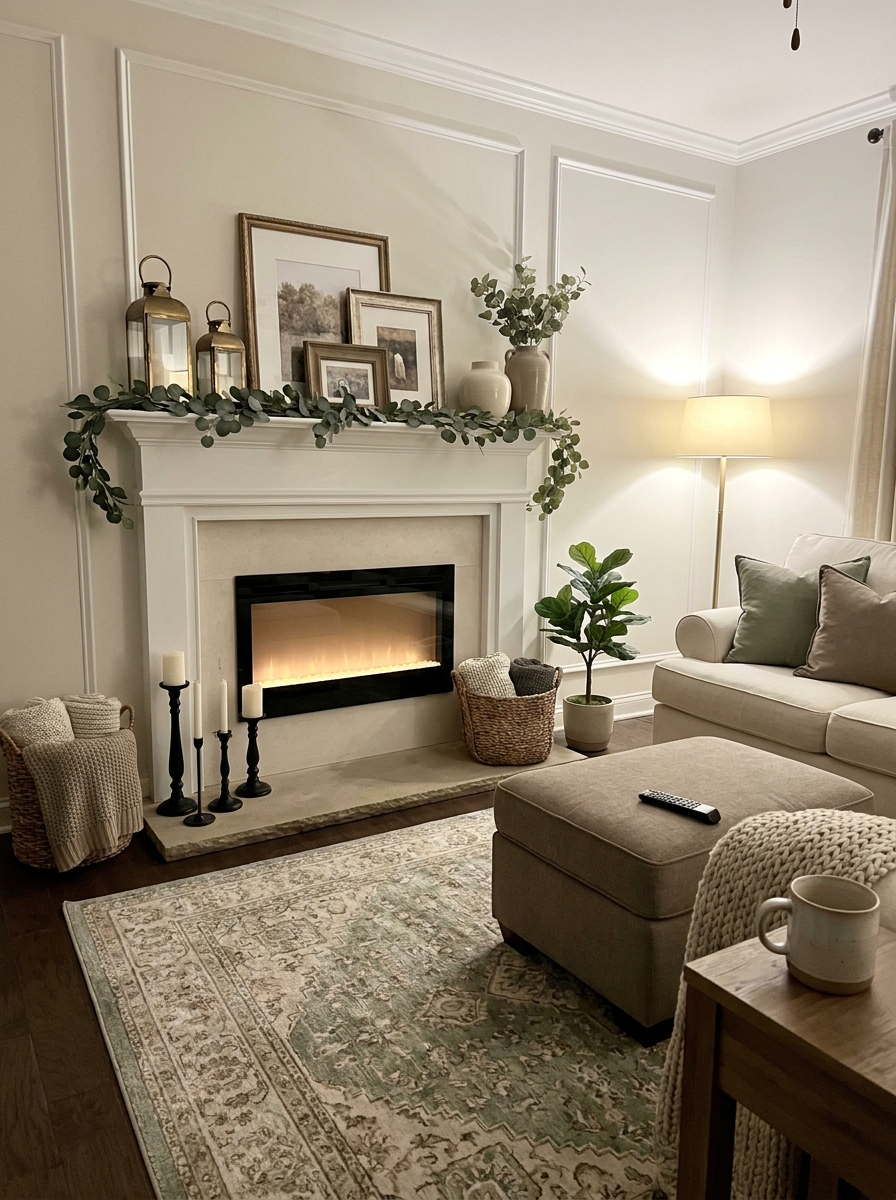
Sometimes the biggest problem is not how the fireplace looks. It is how dead it feels. If the firebox is empty, dark, or totally nonworking, an electric insert can bring it back to life fast. It gives you that flicker and glow that instantly makes a living room feel finished. No venting. No gas line drama. No huge mess. Just a cleaner, cozier focal point that actually adds something to the room. There are so many budget-friendly inserts now, and some are surprisingly realistic. Once it is framed into the opening, the whole fireplace feels more intentional and way more current. Even a plain surround suddenly reads as updated because the center has warmth and movement. That soft flame effect at night is honestly half the makeover. It makes movie nights better. It makes the room feel styled even when toys or laundry are hanging around nearby. If you are trying to transform the space on a real-life budget, this is one of those upgrades that looks bigger than it is. Pair it with simple styling and maybe a little paint cleanup around the surround, and the room feels brand new. It is practical, pretty, and very worth the effort.
Pro Tip: Measure the firebox opening in three places—top, middle, and bottom—before ordering an insert, because older openings are often slightly uneven.
Add an Overmantel Box to Make Short Ceilings Look Taller
A lot of builder fireplaces stop too low, and that can make the whole wall feel stubby. One of my favorite budget tricks is adding an overmantel box above the shelf. Basically, you build a simple framed section that extends the fireplace visually upward. It sounds fancy, but it is really just lumber, drywall or MDF, a little trim, and paint. The payoff is huge. This works so well because it changes the proportions of the room. The fireplace starts to feel more grounded and architectural, almost like it was always meant to reach higher. Even if your ceilings are not tall, the eye moves up, which makes the whole living room feel more open. It also gives you a better spot for art, a mirror, or even a mounted picture light if you want that layered, collected look. I especially love this in newer homes where everything feels a little too spread out and unfinished. That extra vertical structure makes the fireplace wall feel complete. It looks custom, but it is still very doable for under $500 if you keep the design simple. Clean lines, good paint, and a little patience can totally pull this off.
Pro Tip: Keep the overmantel box width aligned with the widest part of the fireplace below so the whole feature looks intentional instead of top-heavy.
Turn the Firebox Into a Decorative Log Niche That Feels Collected
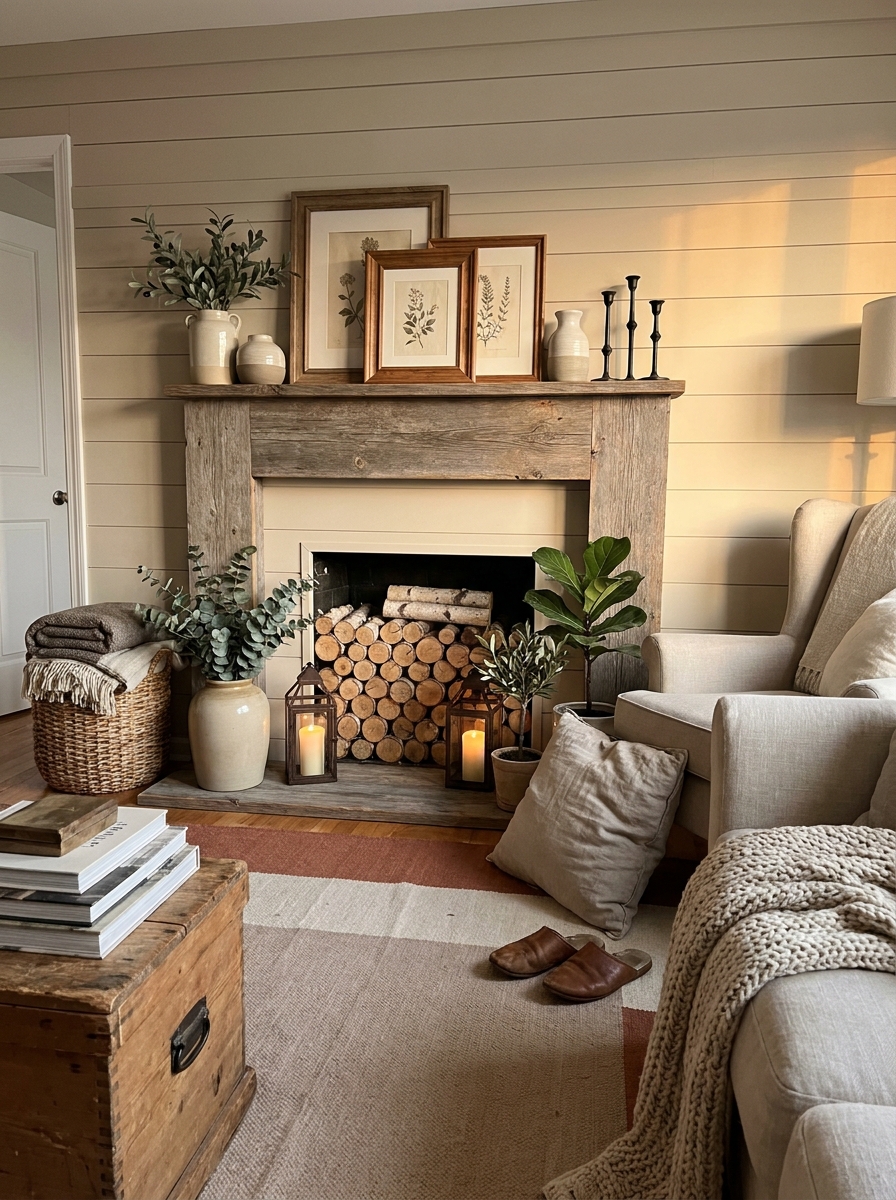
If you do not use your fireplace, there is no reason to leave the opening dark and awkward. Turning the firebox into a decorative log niche is such a simple way to make it feel styled on purpose. You can stack split logs, birch rounds, or even faux wood pieces inside the opening for a layered, textural look. It adds warmth without needing flames, and it makes the whole fireplace feel cozy in every season. This idea works because it plays up natural texture. All that wood grain against painted brick, tile, or a simple surround creates contrast that feels rich and relaxed. It is one of those little changes that instantly makes the room look more finished in photos and in real life. And unlike a lot of decor projects, it still looks good when the rest of the house is not perfectly tidy. I also love how flexible it is. Want a cleaner look? Stack the logs tightly in neat rows. Want something softer? Mix in lanterns or candles in front. It is low effort, low cost, and very forgiving. If your fireplace is just sitting there doing nothing, this is an easy way to make it feel useful again without touching the structure at all.
Pro Tip: Use logs cut to a similar depth so the stack sits flush and looks intentional instead of messy when viewed from across the room.
Build Low Window-Seat Style Benches on Both Sides for a Built-In Look

If your fireplace wall has empty space on either side, this project can completely change the whole room. Adding low benches creates that built-in feeling everyone loves, but without the price tag of custom cabinetry. You can make them from basic stock cabinets, plywood boxes, or even sturdy bench frames with simple tops. Once painted to match the fireplace area, the whole wall feels wider, calmer, and way more finished. What makes this such a smart makeover is that it does more than just look pretty. It adds storage, extra seating, and a place to style baskets, pillows, or books. In a family room, that is gold. The fireplace starts to feel like the center of a complete feature wall instead of one lonely element floating in the middle. It brings balance, especially in newer homes where walls can feel awkwardly blank. I love topping the benches with cushions or leaving them wood for a cleaner look. Either way, it feels thoughtful and custom. And because you are using simple materials and keeping the lines basic, it can still stay under budget. It is one of those projects that makes people think you hired it out, which is always very satisfying.
Pro Tip: Use painter’s caulk where the benches meet the wall and fireplace so the finished build looks seamless and more like true built-ins.
Hang a Picture Light Above the Mantel for a Soft Designer Layer

This one is small, but wow does it change the mood. Adding a battery-powered or plug-in picture light above the mantel gives the fireplace that polished, finished look you usually see in expensive homes. It draws attention right where you want it, whether you have art, a mirror, or just a beautifully painted wall above the shelf. The glow is soft, flattering, and somehow makes everything underneath it look more intentional. I love this idea because it is not about changing the structure. It is about changing the feeling. During the day, the fixture adds a little shape and contrast. At night, it creates that warm pool of light that makes the whole room feel layered and cozy. It is especially great in living rooms that rely on overhead lights and need something gentler. Once you add it, the fireplace starts to feel like a true focal point instead of just another wall. And the best part is how affordable it can be. There are so many good-looking budget options now in aged brass, black, and bronze. It is a quick install, but it gives that collected, elevated finish that makes the whole makeover feel complete.
Pro Tip: Mount the picture light about 6 to 8 inches above your artwork or mirror so the beam hits the center nicely without creating harsh glare.
Quick Guide
Quick Guide: Best under-$500 fireplace updates by budget. Under $75: heat-safe matte black firebox paint, thrifted mantel styling, fresh caulk and paint touch-ups. $75-$150: chunky wood mantel swap, hearth tile refresh with budget tile, faux limewash supplies. $150-$300: DIY trim surround, peel-and-stick tile or stone-look panel update, shiplap bump-out on one focal wall section. $300-$500: combine paint, mantel, hearth tile, and styling for a full before-and-after look. If your fireplace is structurally fine but visually dated, DIY usually wins. If tile is cracked badly or the surround is unsafe, save part of the budget for a pro consult first.
## The Cozy Focal Point Your Living Room Deserves
A fireplace makeover really is one of those rare home projects that changes more than one thing at once. It updates the focal point, yes, but it also makes the whole living room feel more settled. Softer. More finished. Like the room finally knows what it wants to be. And when you can get that feeling with paint, trim, tile, and a few smart styling choices for under $500, it feels even better. The best part is you do not have to copy one exact look. Maybe your room needs painted brick and a chunky mantel. Maybe all it needs is a darker firebox, a cleaner mantel shelf, and better decor. Small shifts count. They really do. Start with the part that bothers you most, then build from there. By the time you work through all 16 ideas, you will probably realize the goal was never to create some showroom fireplace. It was to make your living room feel warm, personal, and pulled together in a way that works for real life. So grab the paint sample, save your favorite idea, and start with one weekend. You’ll be so glad you did.
Frequently Asked Questions
What is the cheapest DIY fireplace makeover idea that still looks high-end?
Painting brick or refreshing the firebox with matte black heat-safe paint is usually the cheapest high-impact option. Add a few thrifted frames and a larger mirror, and the whole fireplace can look much more custom without a huge spend.
Can I makeover a builder-grade fireplace for under $500 without replacing it?
Yes, absolutely. Paint, peel-and-stick tile, DIY trim, a new mantel, and simple hearth updates can all make a builder-grade fireplace look dramatically better without a full replacement. The trick is choosing one or two strong changes instead of ten tiny ones.
How do I make an old brick fireplace look modern farmhouse on a budget?
Start with a warm white painted brick finish, then add a chunky wood mantel or a simple beam. Layer in black accents, neutral decor, a vintage-style rug, and soft greenery to get that modern farmhouse look without making it feel themed.
Are peel-and-stick tiles safe to use around a fireplace surround?
Some are, and some definitely are not, so always check the manufacturer’s heat-clearance guidelines first. They can work well on outer surround areas that do not get too hot, but for high-heat zones you need materials rated appropriately for fireplace use.