
You walk into those gorgeous kitchens on Instagram and wonder how much money it took to create that look. Spoiler alert: probably way less than you think. I’ve been renovating kitchens for years, and here’s what I’ve learned — the difference between a budget kitchen and an expensive-looking one often has nothing to do with price tags. It’s about knowing where to splurge your energy and where to get clever with affordable swaps. Most high-end kitchens rely on the same tricks: great paint colors, updated hardware, smart styling, and a few strategic upgrades that make everything else look more expensive. You don’t need marble countertops or custom cabinetry to get that polished, pulled-together vibe. These 13 ideas will show you exactly how to transform your kitchen without draining your savings account. Some take a weekend. Others just take a trip to the hardware store. Here’s what actually works.
Paint Your Cabinets in a Trending Two-Tone Finish

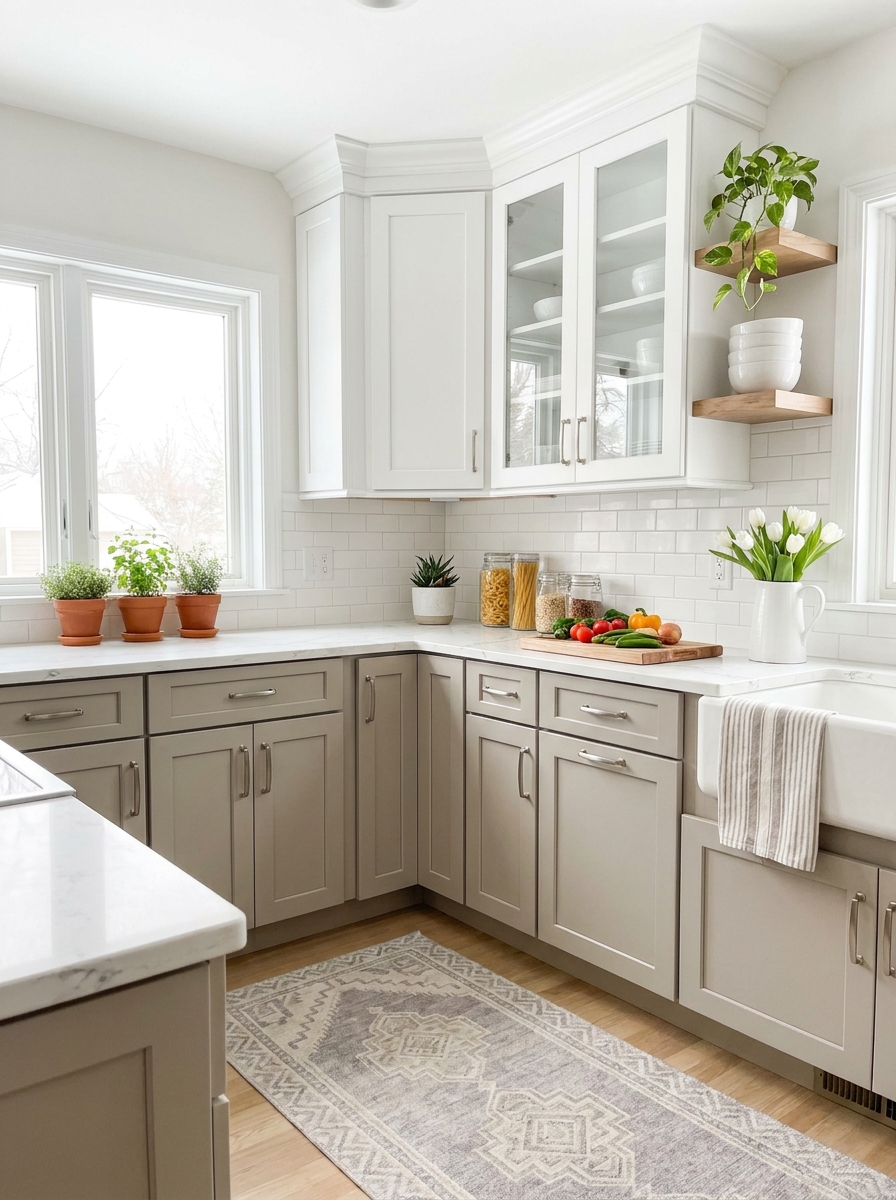
Nothing transforms a kitchen faster than paint. And I mean nothing. Two-tone cabinets are having a serious moment right now, and they’re the perfect way to add visual interest without spending thousands on new cabinetry. Paint your lower cabinets in a deep, moody color like navy or charcoal, then keep your uppers crisp white or soft cream. The contrast instantly makes your kitchen look custom and considered. The trick is choosing colors that feel current but not trendy. Navy blue has been popular for years and still looks fresh. Same with sage green or a warm greige. These colors photograph beautifully and make cheap builder-grade cabinets look like they cost a fortune. Don’t skip the prep work, though. Sand everything, use a good primer, and invest in quality cabinet paint. The finish matters just as much as the color. A smooth, professional-looking paint job can fool anyone into thinking you hired a contractor. Use a small foam roller for the flattest finish and barely-there brush strokes on the edges.
Pro Tip: Remove all cabinet doors and paint them flat on sawhorses — you’ll get a smoother finish than painting them vertically, and no drips to worry about.
Swap Out Hardware for Instant Luxury
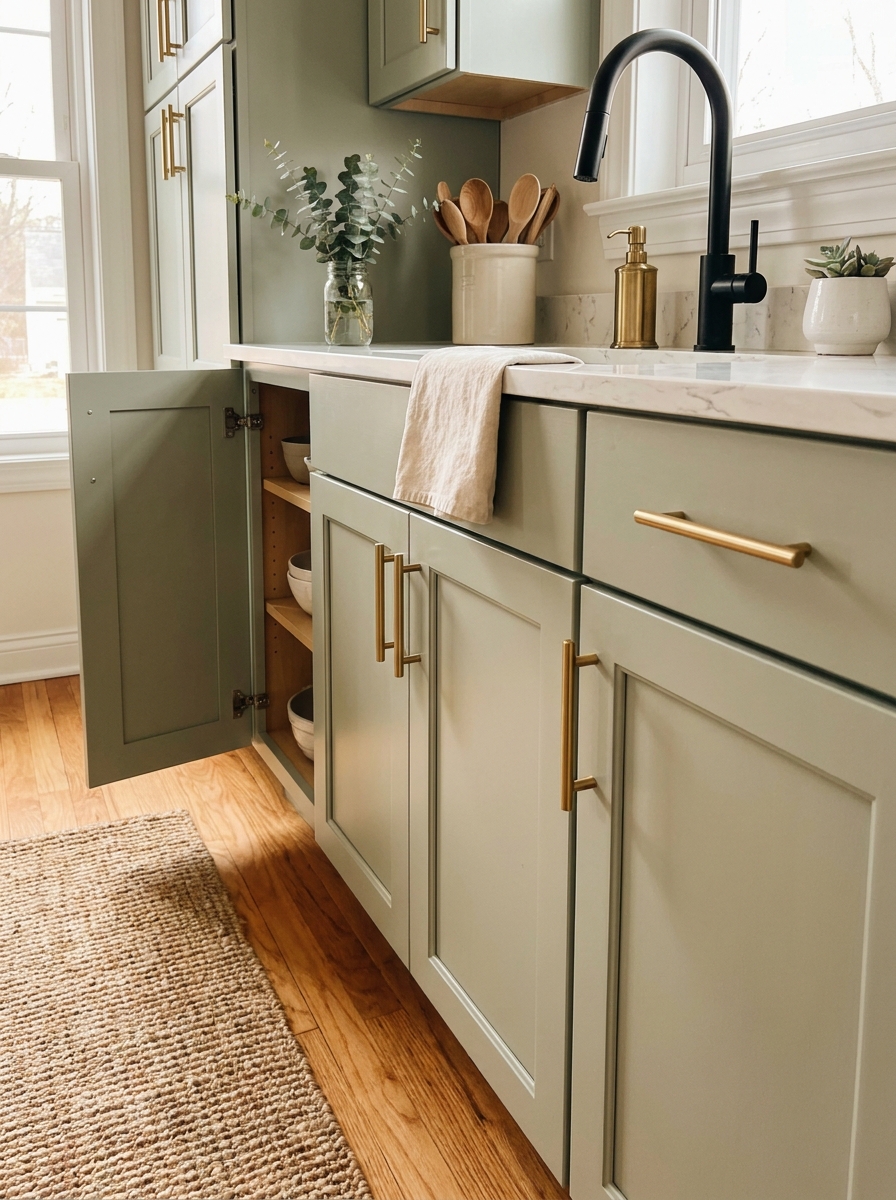
This is the easiest upgrade that makes the biggest visual impact. I’m talking about cabinet pulls and knobs. Builder-grade hardware is usually cheap brushed nickel or basic chrome, and it screams rental apartment. Swap those out for brass bar pulls or matte black cup pulls, and suddenly your entire kitchen looks intentional and expensive. It’s wild how much of a difference this makes. You can find gorgeous hardware on Amazon, Etsy, or even Home Depot for a fraction of what you’d pay at a specialty store. Measure your existing holes first so you don’t have to drill new ones — unless you’re okay with a little extra work. I actually love the look of slightly oversized pulls that cover old holes if you’re switching styles. Mix metals if you want a more collected, high-end look. Brass pulls on cabinets with a matte black faucet feels modern and layered. Just keep it consistent within each element — all brass on cabinets, all black on plumbing fixtures. That’s the trick to making it look designed instead of random.
Pro Tip: Buy a few extra pieces of hardware as backups — nothing worse than being one pull short and finding out your style is discontinued when you need to reorder.
Install Open Shelving for a Custom Look
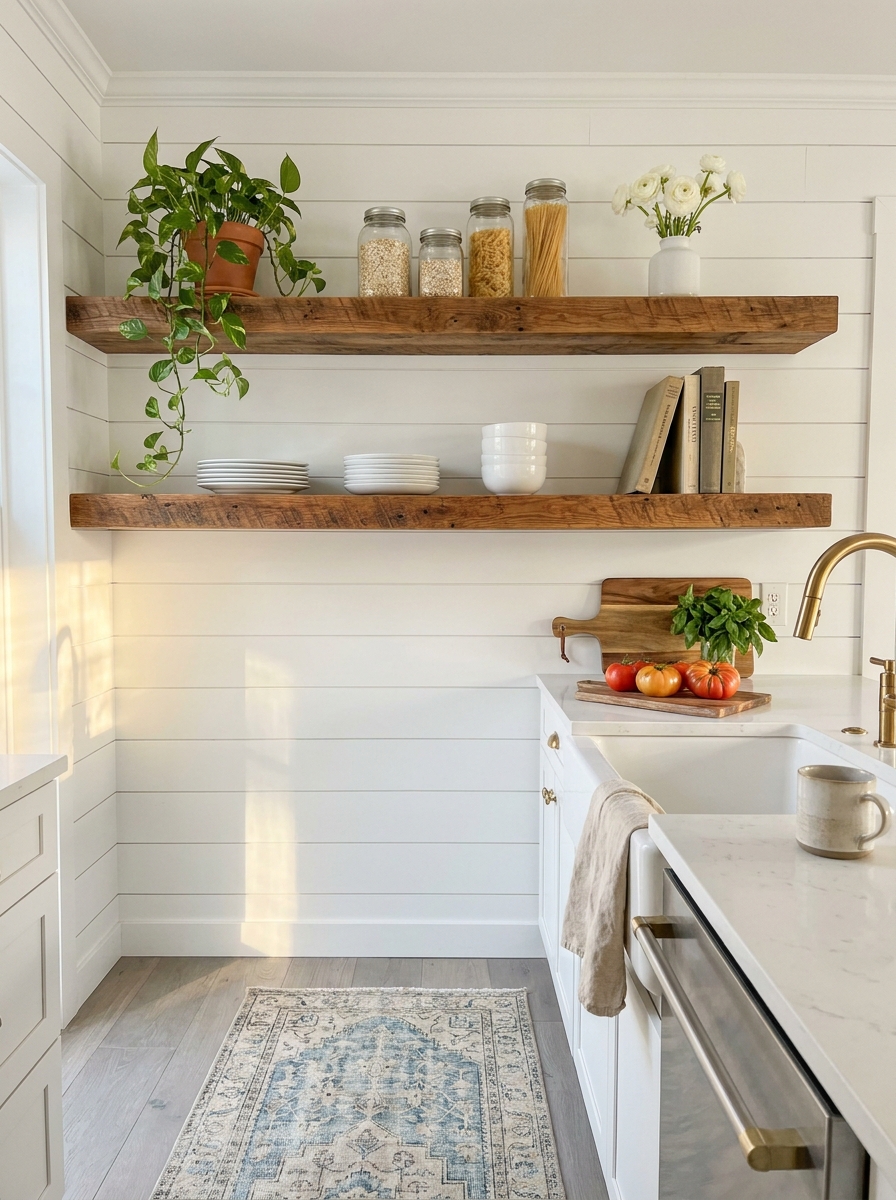
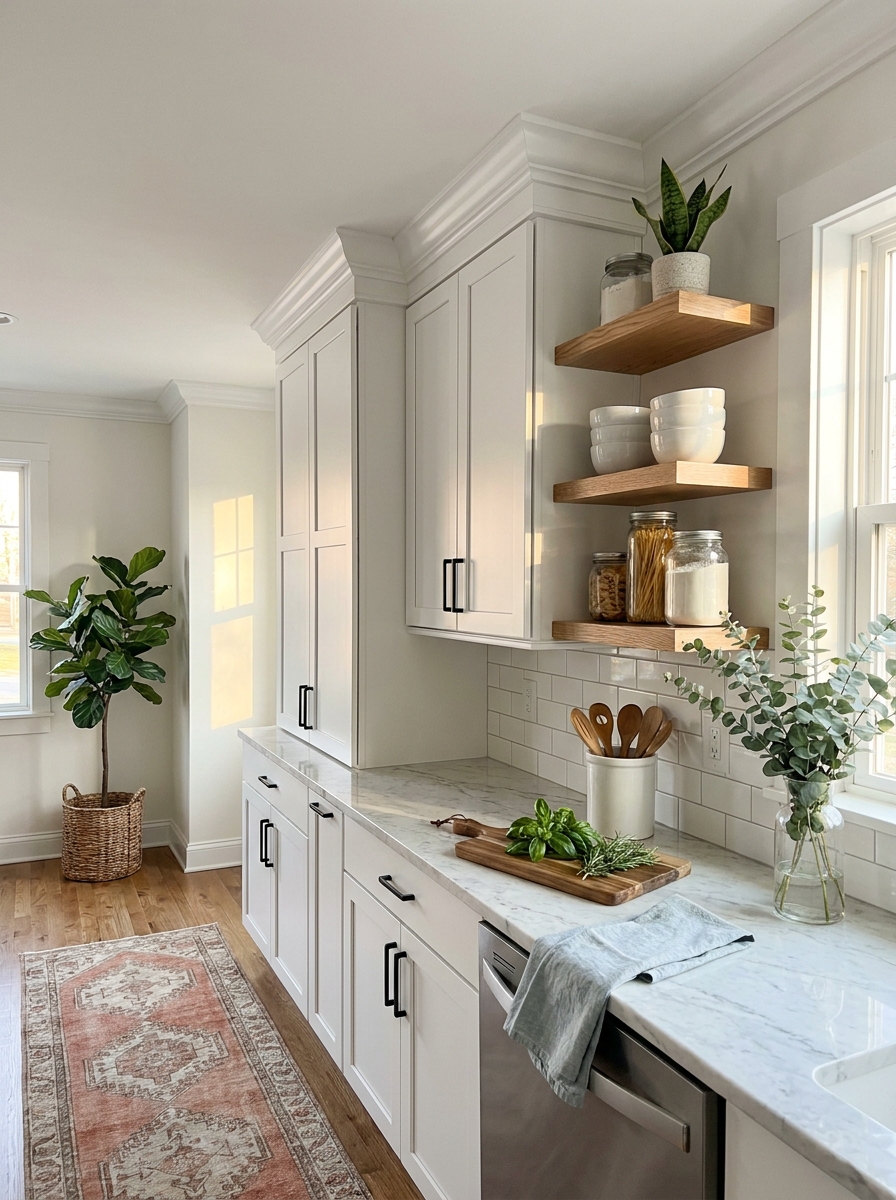
Open shelving is one of those features that instantly makes a kitchen look more expensive and considered. And it’s shockingly affordable to DIY. You can remove a few upper cabinets and replace them with simple wooden shelves for under $100. Use chunky wood brackets in black or brass, or go for floating shelves if you want a more modern vibe. The key is styling them well — this isn’t storage, it’s decor. Stack white dishes, add a few glass canisters with pretty dry goods, tuck in some greenery or a small vase. Keep it simple and a little sparse. Overcrowded shelves look messy, but thoughtfully styled ones look like a designer lives there. Stick to a consistent color palette on the shelves — whites, creams, natural wood, and maybe one accent color. If you’re nervous about losing cabinet space, just replace one or two uppers near a window or over the sink. You still get the high-end look without sacrificing too much storage. And honestly? It forces you to be more intentional about what you keep, which is never a bad thing.
Pro Tip: Install shelves at slightly different heights instead of perfectly evenly spaced — it looks more custom and less builder-grade symmetrical.
Add a Peel-and-Stick Backsplash That Looks Real
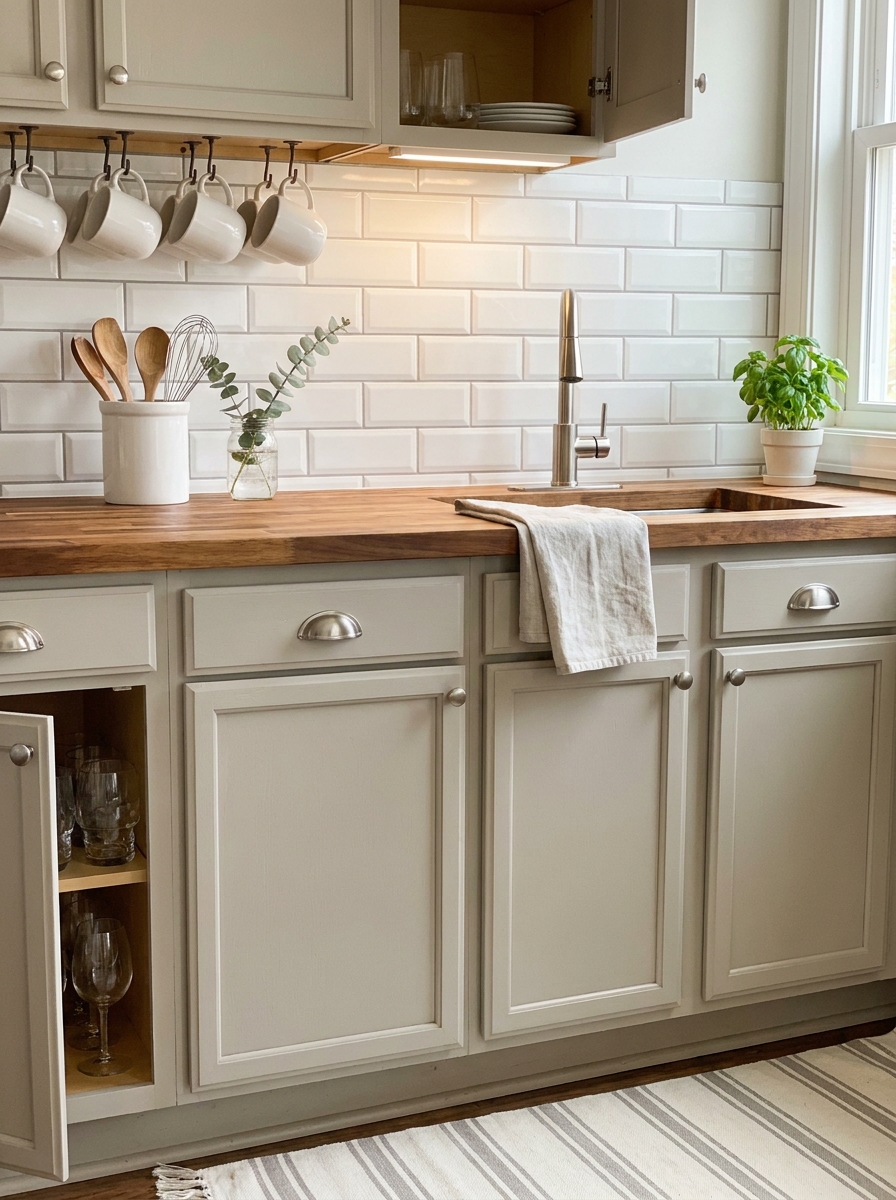
Backsplash tile can cost a fortune when you factor in materials and installation. But peel-and-stick options have come so far in the last few years that some of them are genuinely hard to distinguish from real tile. I’m not talking about the cheap plastic-looking stuff from five years ago. The new generation of peel-and-stick tiles have texture, dimension, and realistic grout lines. You can find subway tile, marble hexagons, or even zellige-look options that photograph beautifully and hold up surprisingly well. The trick is prepping your wall properly and taking your time with installation. Clean the surface thoroughly, make sure it’s smooth, and use a level. Rushed peel-and-stick looks obvious. Carefully applied peel-and-stick can fool most people, especially in photos. This is one of those upgrades that makes your whole kitchen look more finished and polished. A fresh white subway tile backsplash with gray grout can make even the most basic kitchen feel clean and current. And if you get tired of it in a few years? Just peel it off and try something new. That’s the beauty of it.
Pro Tip: Start your backsplash installation from the center of the wall and work outward — this ensures your pattern stays centered and symmetrical, especially around windows or the stove.
Upgrade Your Lighting Fixtures for Instant Drama

Listen, nothing screams “budget kitchen” louder than builder-grade lighting. But here’s the secret: swapping out those sad fixtures is one of the fastest ways to add serious style without breaking the bank. I’m talking statement pendant lights over your island, a chic flush-mount where you used to have that awful boob light, or even some trendy sconces flanking open shelving. You can find gorgeous options at places like Home Depot, Wayfair, or even Amazon for under $100. The installation is usually straightforward — my husband did ours in about 20 minutes. The transformation is instant. Good lighting doesn’t just brighten your space; it creates ambiance and draws the eye up, making your whole kitchen feel more expensive. I went with black geometric pendants over my island, and people always ask if I hired a designer. Nope! Just $75 and a Saturday morning.
Pro Tip: Mix metal finishes strategically. If your cabinet hardware is brass, try matte black light fixtures for contrast. This layered look screams “professionally designed” and costs you nothing extra.
Refresh Your Countertops with Contact Paper or Paint
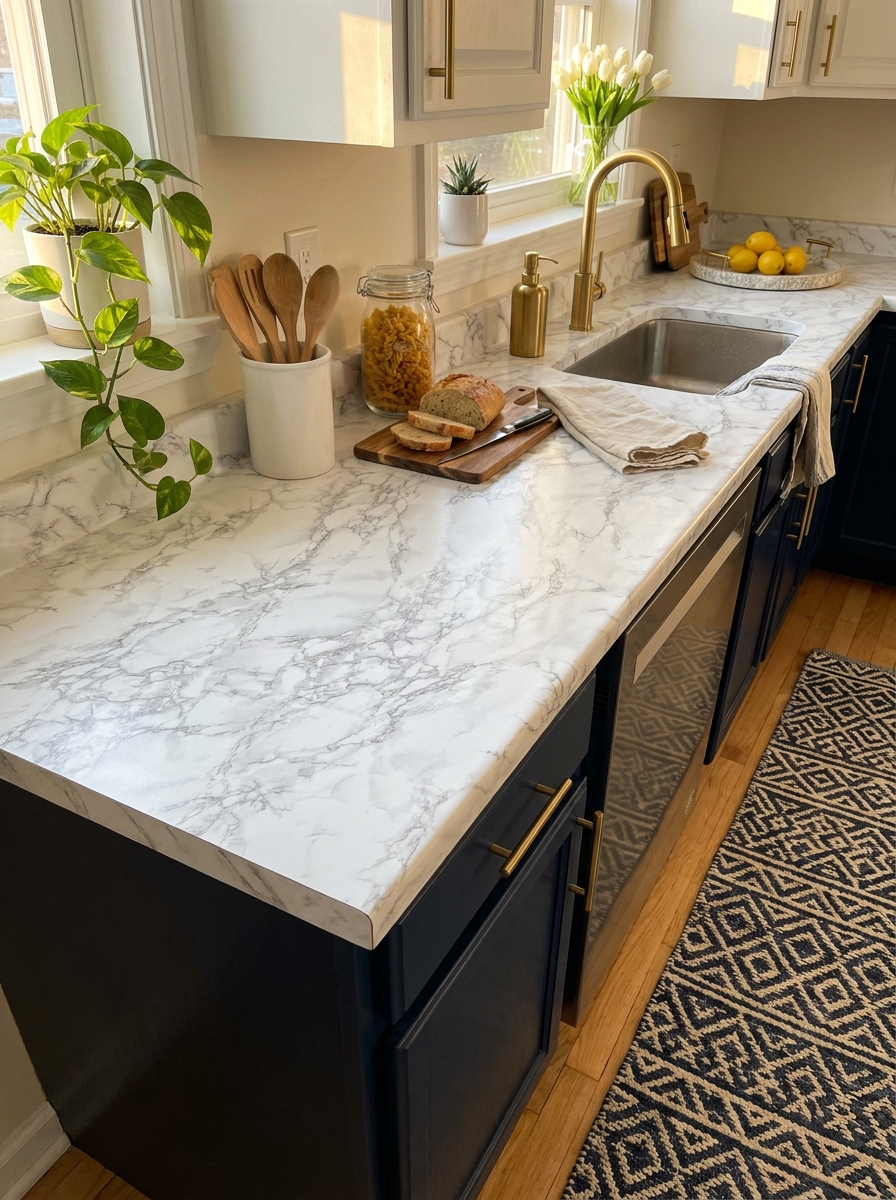
Okay, I know this sounds crazy, but hear me out. If you’re stuck with ugly laminate countertops and can’t afford granite or quartz right now, there are some seriously impressive budget hacks that’ll buy you time until you can do the real thing. Marble-look contact paper has come a long way. I’m talking realistic patterns that don’t look like your grandmother’s shelf liner. You can cover your existing countertops for under $50, and if you’re careful with the application, it actually looks pretty convincing from a few feet away. Another option? Countertop paint kits that mimic stone. They take a weekend and about $100, but the results can be stunning. I did the contact paper trick in my rental kitchen, and it lasted two years before I needed to replace it. Sure, it’s not permanent, but it transformed my space from “yikes” to “actually pretty nice” for the cost of a dinner out.
Pro Tip: Prep is everything. Clean your countertops thoroughly with rubbing alcohol, let them dry completely, and use a squeegee or credit card to smooth out bubbles as you apply. Take your time — rushing leads to wrinkles.
Paint or Wallpaper an Accent Wall for Personality

Here’s something most people overlook: your walls are free real estate for style. A bold accent wall behind your open shelving or a fun peel-and-stick wallpaper in your breakfast nook can completely change the vibe of your kitchen for less than $50. I’m obsessed with how one statement wall can make everything else in your kitchen look more intentional and designed. Maybe it’s a deep charcoal behind white shelves, or a subtle textured wallpaper that adds depth without overwhelming. The key is choosing something that complements your existing colors but adds that “wow” moment. Peel-and-stick wallpaper is your best friend here because it’s renter-friendly and you can change it whenever you want. I’ve seen people do everything from modern geometric patterns to soft florals to faux shiplap. It takes maybe two hours to install, and suddenly your kitchen has a focal point that makes it feel custom and expensive.
Pro Tip: Choose your accent wall strategically. The wall behind open shelving or the one you see when you walk into the kitchen makes the biggest impact. Avoid walls with lots of cabinets — you won’t see enough of it to matter.
Style Your Kitchen Like a Designer with Strategic Decor

Here’s the truth: even the most expensive kitchen remodel can look blah without proper styling. And the best part? Styling costs almost nothing but makes everything look like it came straight out of a magazine. I’m talking about the details. A wooden cutting board leaning against your backsplash. Fresh herbs in pretty pots on the windowsill. A vintage brass tray corralling your olive oil and salt. These little touches make your kitchen feel curated and lived-in, not staged. The trick is editing ruthlessly — less is always more. Think about what you see in those dreamy kitchen photos on Pinterest. It’s never cluttered, but there are always a few perfectly chosen items that make the space feel warm and personal. A bowl of lemons. A linen towel draped just so. These cost pennies but add hundreds of dollars of perceived value to your space.
Pro Tip: Use the “rule of three” when styling countertops and shelves. Group items in odd numbers — three glass jars, a plant, cutting board, and utensil crock together. It looks intentional and professionally designed without trying too hard.
Install a Faux Range Hood for Architectural Interest

Want that custom kitchen look without the custom price tag? A DIY range hood cover is your secret weapon. You can build one from basic lumber and paint it to match your cabinets, or even wrap an existing builder-grade hood in shiplap or beadboard. The result? Instant architectural drama that makes your kitchen feel intentional and designed. I love how this upgrade draws the eye up and creates a focal point over your stove. You can keep it simple with a clean box design, or add corbels and trim details for a more traditional look. Paint it in a contrasting color to your cabinets, or match it perfectly for a seamless built-in vibe. Either way, it reads as expensive custom millwork. The best part? Most DIY range hoods cost under $100 in materials and can be completed in a weekend. It’s one of those projects that photographs beautifully and makes guests ask who did your renovation.
Pro Tip: Add a small wooden shelf across the front of your range hood to display a few styled items like a small plant, pretty oil bottles, or a vintage cutting board — it makes the whole feature feel even more custom and intentional.
Replace Just Your Upper Cabinet Doors for a Fresh Look
Here’s a budget hack most people don’t think of — you don’t have to replace or paint all your cabinets. Sometimes just swapping out the upper cabinet doors (or removing them entirely) can completely transform your kitchen. New shaker-style doors are surprisingly affordable online, and installation is straightforward if your existing frames are in good shape. This works especially well if your lower cabinets are in decent condition but your uppers feel dated or dark. Replace them with bright white doors, or go bold with glass-front inserts to show off pretty dishes. You get that fresh, updated look for a fraction of the cost of a full cabinet overhaul. I’ve seen people mix this approach with open shelving too — replace some doors and remove others for a custom, collected look. It’s all about working smarter, not harder. Your kitchen will look like you invested thousands when you really just upgraded the most visible part.
Pro Tip: If you’re keeping your lower cabinets as-is, update all the hardware throughout the kitchen at the same time — matching pulls and knobs will tie everything together and make the partial update look completely intentional.
Add Crown Molding to Builder-Grade Cabinets
This is the upgrade that makes people think you had custom cabinets built. Adding crown molding to the top of standard builder-grade cabinets instantly elevates them from basic to bespoke. It’s one of those small details that creates a huge visual impact, and it’s shockingly affordable if you DIY it. You can find pre-made crown molding at any home improvement store, and installation is easier than you think — especially if you use a brad nailer. Paint it the same color as your cabinets for a seamless built-in look, or go bold with a contrasting color for drama. Either way, it fills that awkward gap between your cabinets and ceiling and makes the whole kitchen feel more finished. I love how this single detail changes the entire vibe of a kitchen. It adds height, draws the eye up, and gives your space that expensive, custom millwork look. For under $200 in materials, you get a transformation that photographs like a luxury kitchen.
Pro Tip: Paint the wall above your cabinets the same color as the crown molding before you install it — this creates a cohesive look and hides any small gaps or imperfections where the molding meets the wall.
Create a Coffee Bar Station for Boutique Hotel Vibes
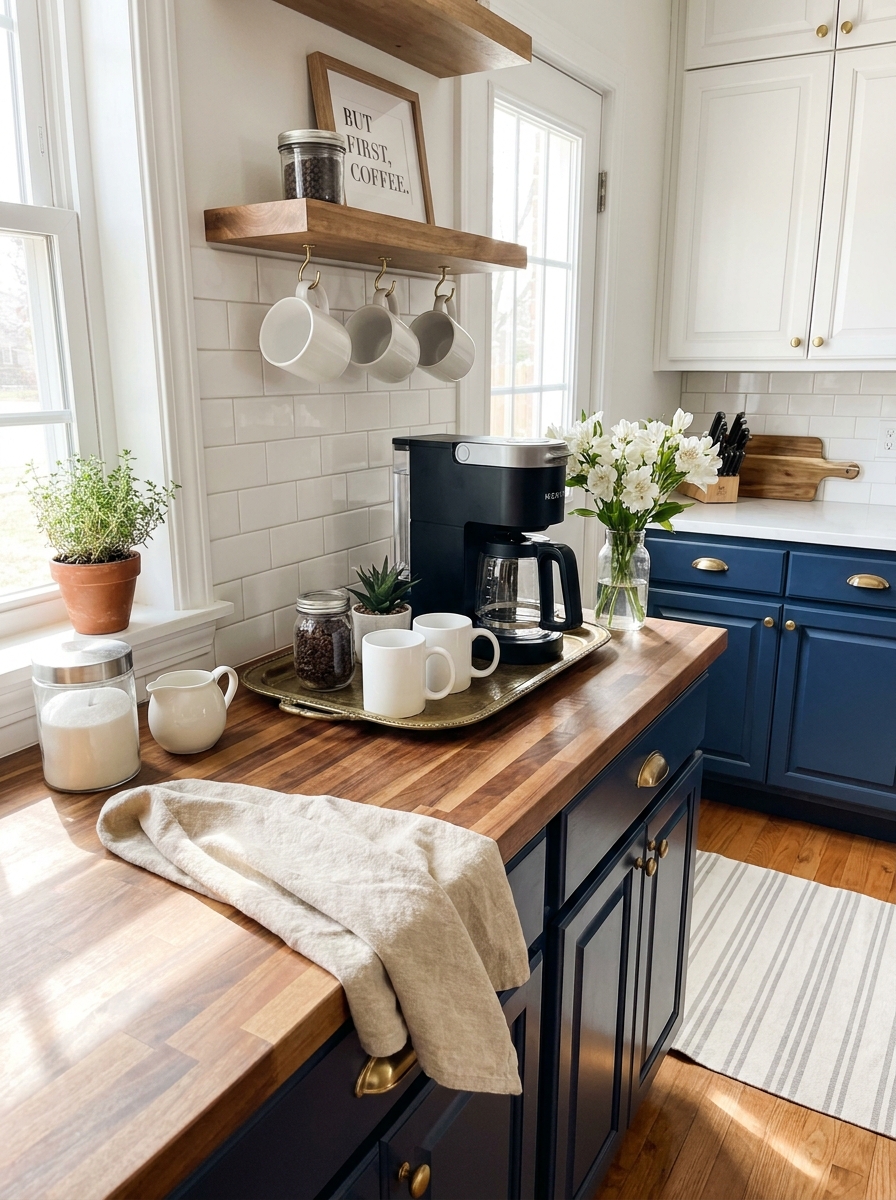
A dedicated coffee bar instantly makes your kitchen feel intentional and styled — like you hired a designer to create functional zones. The best part? You can create this look in any kitchen, even without a ton of space. Clear a section of counter, add a tray or small cart, and style it with your coffee essentials and a few pretty accessories. I love using a vintage tray or wooden cutting board as a base to corral everything — your coffee maker, pretty mugs, a small plant, and maybe a canister of coffee beans. Add a small piece of art or a floating shelf above with hooks for mugs, and suddenly you have a boutique coffee shop moment in your own home. This works because it’s both beautiful and functional. You’re creating a designated space that looks curated and expensive, but you’re really just organizing what you already use every day. Style it once, and it stays photo-ready with minimal effort.
Pro Tip: Use a small battery-operated LED strip light under your upper cabinets above the coffee bar — it creates that warm, glowing coffee shop ambiance and makes the whole station feel special and intentional, especially in the early morning.
Install Floating Shelves Under Your Upper Cabinets
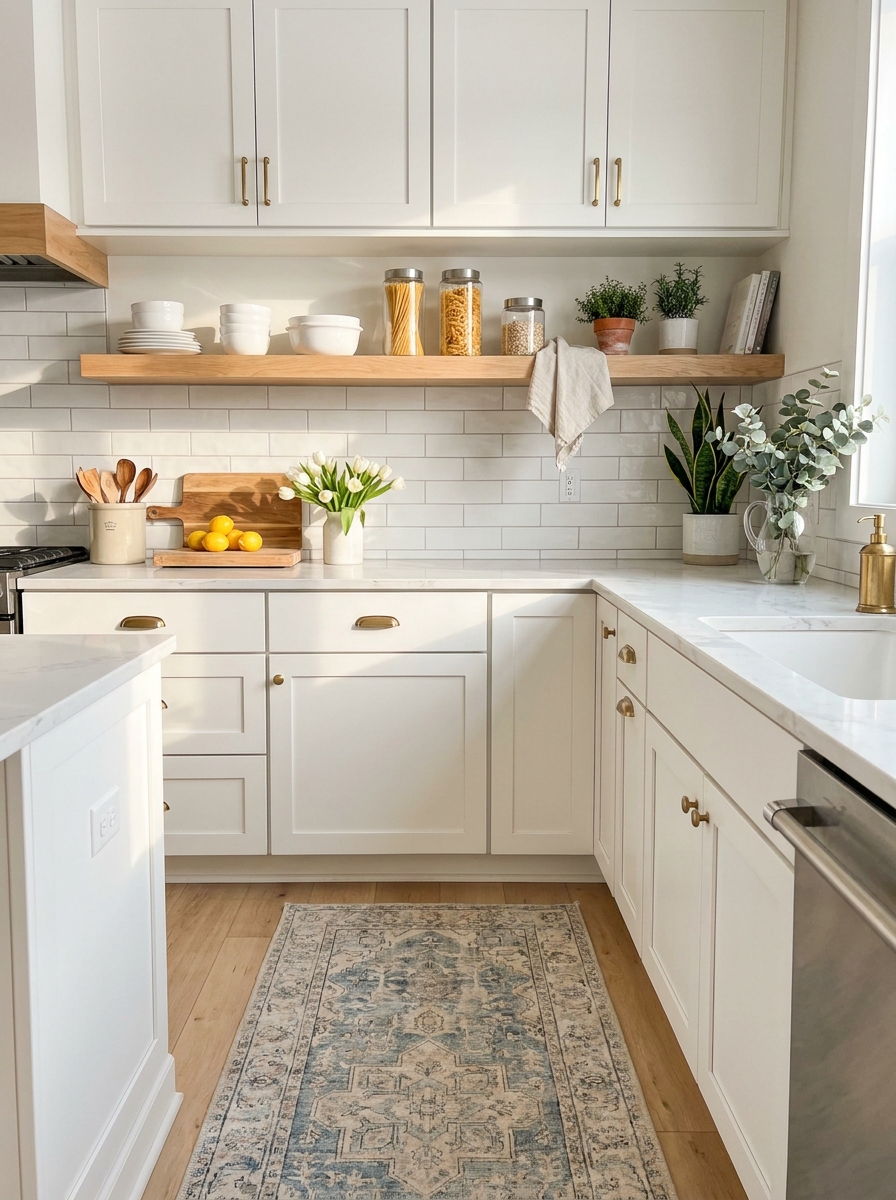
Here’s a genius trick that adds so much function and visual interest — install a floating shelf or two directly underneath your existing upper cabinets. This creates extra display space and breaks up that big blank wall of cabinetry that can feel heavy and dated. I love this because it gives you a spot to style pretty things like vintage cutting boards, a row of white dishes, or a collection of glass jars. It makes your kitchen feel more curated and custom, like you had built-ins designed just for you. The best part? Floating shelves are incredibly affordable and super easy to install yourself with just a drill and a level. This works especially well if you have a lot of upper cabinet space but not enough lower storage. You can use the floating shelf for everyday items you grab constantly — coffee mugs, spice jars, olive oil bottles — while keeping the upper cabinets for things you use less often. It’s practical and pretty, which is exactly what we want in a budget kitchen remodel.
Pro Tip: Paint your floating shelves the same color as your cabinets for a cohesive built-in look, or go with natural wood for warm contrast against white cabinets.
Your Kitchen Doesn’t Need a Fortune to Feel Expensive
Here’s the truth about high-end kitchens: they’re not about how much you spend. They’re about intentional choices, good editing, and knowing which details actually matter. You can absolutely create a space that feels custom and polished without gutting everything or taking out a loan. Paint transforms cabinets. Hardware elevates the entire look. A fresh backsplash makes everything feel finished. And smart styling pulls it all together into something that looks like you hired a designer. Start with one or two projects that excite you most. Maybe it’s painting your cabinets that perfect shade of navy you’ve been dreaming about. Or finally swapping out that builder-grade hardware for something with actual personality. Small changes build momentum, and before you know it, you’ve created a kitchen that makes you happy every time you walk into it. That’s the whole point, right? A kitchen that feels like yours — beautiful, functional, and completely worth the effort you put into it. You’ve got this.
Frequently Asked Questions
What’s the cheapest way to make my kitchen look expensive?
Paint your cabinets and upgrade your hardware. These two changes cost under $300 if you DIY, but they transform the entire look of your kitchen. Choose on-trend colors like navy, sage, or greige for cabinets, and swap basic hardware for brass or matte black pulls. The visual impact is immediate and dramatic.
Can I really install a backsplash myself with peel-and-stick tile?
Absolutely. Today’s peel-and-stick tiles are incredibly realistic and much easier to install than traditional tile. Clean your wall thoroughly, use a level, and take your time lining up each tile. Start from the center and work outward for the most professional look. It’s a weekend project that makes a huge difference.
How do I choose cabinet paint colors that won’t look dated?
Stick with classic colors that have been popular for several years — navy blue, soft sage green, warm greige, or charcoal gray. Avoid ultra-trendy shades that just hit the market. Two-tone kitchens with white uppers and a colored lower also feel timeless. Test sample colors in your actual kitchen lighting before committing.
Is open shelving practical for everyday use or just for looks?
It can be both if you style it right. Use open shelves for items you actually use daily — dishes, glasses, or pretty storage containers. Keep it edited and dust regularly. If you’re worried about practicality, replace just one or two upper cabinets with shelves instead of doing an entire wall. You get the high-end look without sacrificing too much closed storage.
What kitchen upgrades give the best return on investment?
Cabinet painting, hardware updates, and improved lighting give you the most bang for your buck. These upgrades are relatively inexpensive but create dramatic visual change. Fresh paint can make old cabinets look custom, new hardware elevates the whole space, and good lighting makes everything look better. Focus your budget on these three areas first.